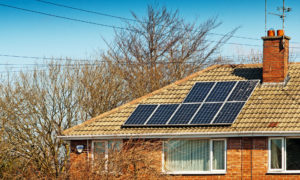
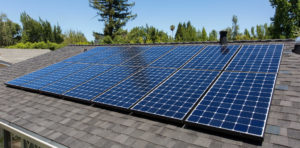
Solar has already been installed in millions of Australian homes, and many more are considering it. If you’re thinking about going solar, you’re probably curious about what happens during a solar panel installation or even how to do it yourself. Before you mount solar panels, you should be aware of five essential steps. A solar panel installation guide will help you sign your solar contract and determine whether or not the solar panels on your roof will power your house. For the standard solar panel installation guide, Energenic has outlined a basic five-step procedure.
Solar panel installation guide: five main steps
However, scientists agree that human activity has largely destroyed the environment. This is why many governments are mandating renewable technology, and that’s why many people are opting to install solar panels to make their homes more environmentally friendly. Even if you’re not doing it to help heal the ozone layer, the fact that you can become energy-independent and even profit from selling electricity back to the grid can be enough to plunge you.
There are five significant steps to a solar installation that your chosen solar company will generally follow:
- Engineering site visit
- Permits and documentation
- Ordering equipment
- Solar panel installation
- Approval and interconnection
1: Engineering site visit:
Following the signing of your solar panel installation contract, an engineer will visit your home, office, factory, or shop to evaluate the electrical condition of your property and ensure that all is in working order with your new energy system. This engineer will typically work directly for your installer and will be a contracted independent provider.
The engineer will assess the condition of your roof during the visit to ensure that it is structurally sound. They’ll even check your electrical panel, which is the grey box in your basement, to see if it needs to be changed. If an installer tells you that your electrical panel needs to be upgraded, it means that your new solar panels will need more amps of current, and your electrical box’s ampere capacity will need to be improved.
This engineer visit is distinct from a general site visit, which occurs before any contract is signed and involves an installer evaluating the property to determine device size, roof type, roof angle, shading, and other factors. Additionally, although an engineer can usually visit, the installer will take photographs of the property and take roof measurements in some cases.
2: Permits and documents:
Installing solar panels, like any major financial decision, entails a significant amount of paperwork. While the installer does the majority of the paperwork, it’s still a good idea to know what’s going on behind the scenes of your solar installation. State and federal solar incentives, such as the federal ITC, local solar programs, clean energy financing initiatives like PACE, government rebates, and solar renewable energy certificates, are only a few of the items you’ll be applying for (SRECs).
You’ll need to fill out other paperwork, such as construction permits, in addition to applying for benefits. These permits are exclusive to your place. Your installer will be familiar with the restrictions and requirements of the states in which they work and will assist you in determining which permits you will need – in certain situations, the installer will complete this paperwork for you.
3: Ordering equipment:
Your installer will be able to place an equipment order through their primary distributor now that you’ve finished the required paperwork. If you’re looking for equipment suggestions, here are a few items to think about.
Solar panels and inverters are the two most essential components to consider for your device. The main requirement most homeowners use to compare brands is durability, efficiency, and aesthetics.
Spend some time researching microinverters vs. string inverters vs. power optimizers, as well as the best-rated solar panels on the market, to ensure you’ve chosen the right equipment for your system.
Considering your equipment choices will make you feel more prepared for the purchasing and delivery stages of the installation process.
Your property is added to your installer’s queue until the equipment ordering process is completed. Your panels and inverters will most likely arrive on the day of your installation, which can happen once your paperwork is approved (typically within one to two months).
4: Solar installation:
Every solar homeowner is looking forward to the actual installation. Your solar installer will begin by planning your roof and inspecting the shingles or tiles for proper installation. Then they run electrical wiring to your electrical panel and the rest of your power grid.
They can mount racking to protect your panels after the electrical wiring is completed. The panels are mounted to the racking until it has been level and secured. Finally, the inverter(s) are connected to the panels to convert direct current (DC) energy into alternating current (AC) energy, which is used in homes and on the grid.
The installation time can vary between one and three days, depending on the size of the installing system.
5: Approval and interconnection:
A representative from your town government will need to inspect and approve your solar panels before you can link them to the electric grid. The representative will essentially double-check your installer’s work during this inspection. He’ll double-check that the electrical wiring was done correctly, that the mounting was securely attached, and that the overall installation complies with standard electrical and roof setback codes.
You’ll be ready for official grid interconnection after this local inspection. A representative from the electric company will come to complete a final evaluation of the solar panel system. You should expect to wait two weeks to a month for the town and utility approvals, as well as for the interconnection to be finished.

